# Clash X
**准备工作**
* 系统为MAC OS的电脑
* 注册Teraport账户并购买Teraport服务
* 已安装ClashX\[[网站下载](https://install.appcenter.ms/users/clashx/apps/clashx-pro/distribution_groups/public)]
* 本教程所有步骤均使用MAC OS电脑操作
快速上手(图文)
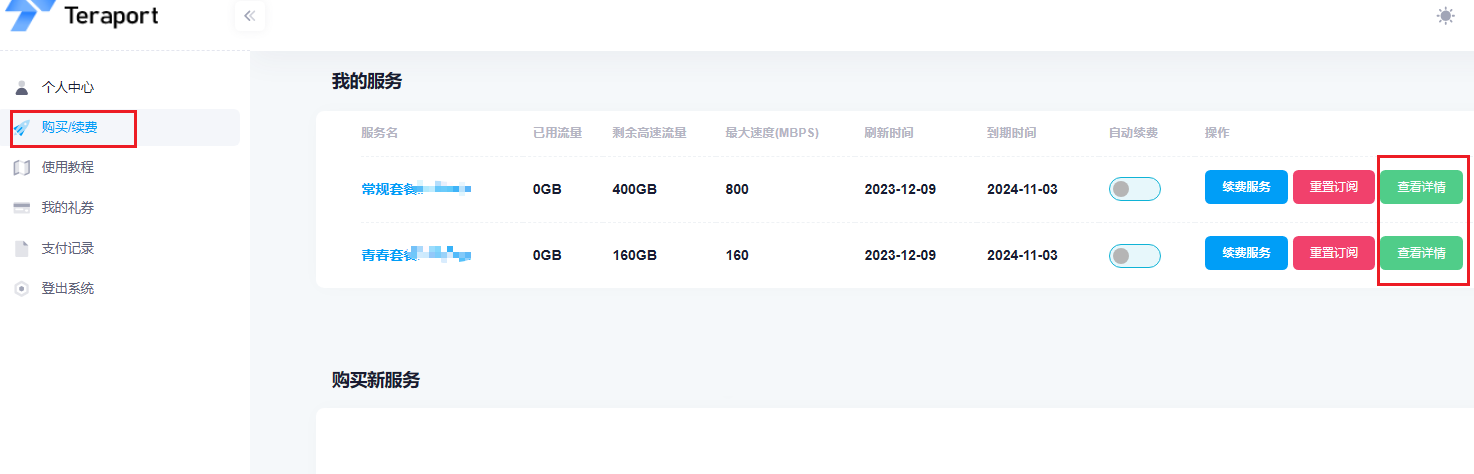
1.登录Teraport网站点击左侧导航栏,找到如下界面。
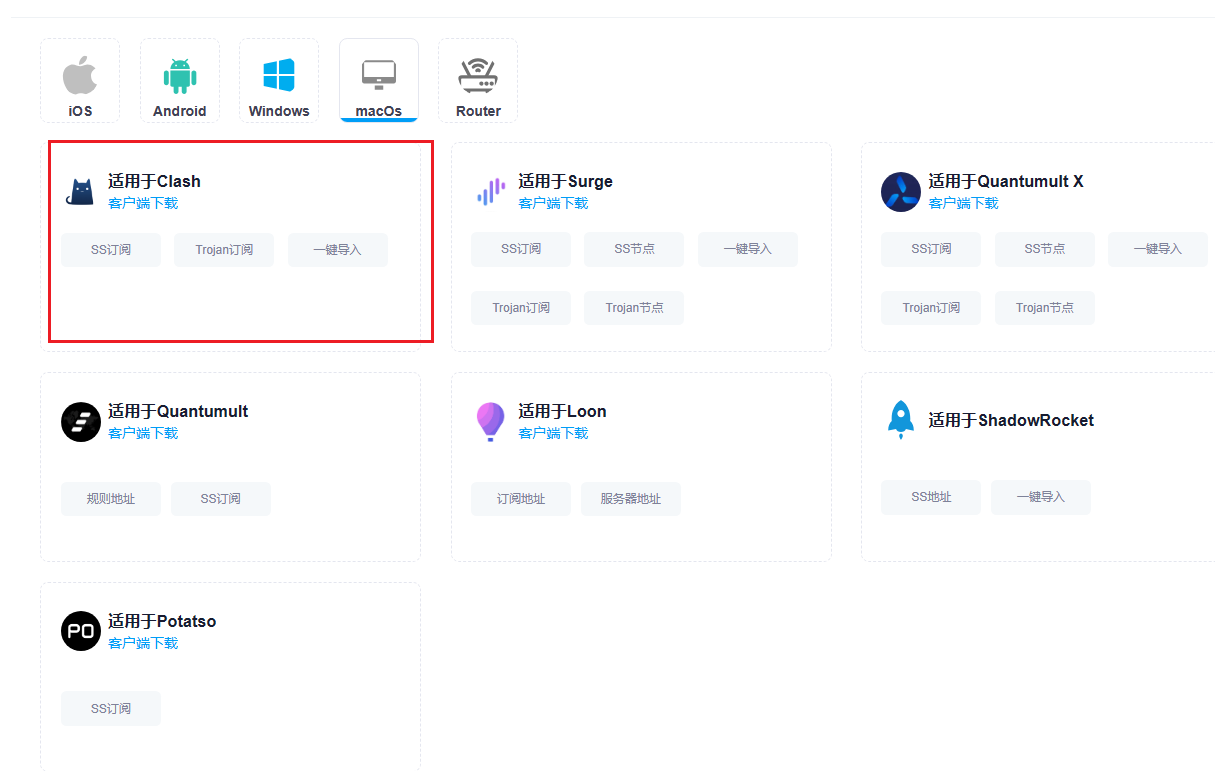
 2.点击“查看详情”,进入服务详细界面,点击“MacOS客户端”–>“复制订阅”(两个订阅任选其一,并无区别)。
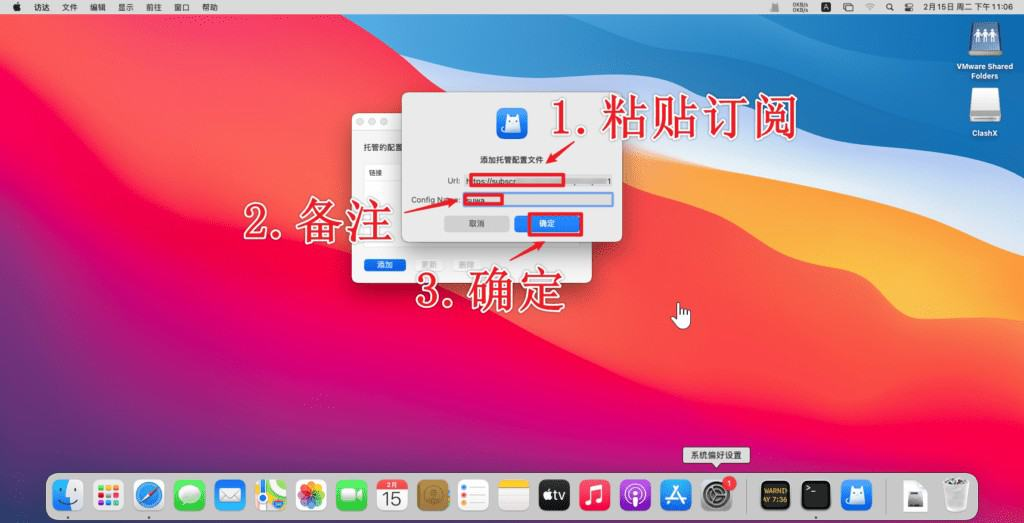
 3.打开Clash X添加配置托管文件,点击菜单栏中的 ClashX 图标打开菜单,进入 配置 > 托管配置 > 管理。
 4.在托管的配置文件窗口,点击 “添加” 在 Url 一栏中输入 Clash 配置订阅链接,Config Name 为配置文件名,可以随意命名。

 5点击右上方系统托盘的ClashX图标,选择节点。direct不要选
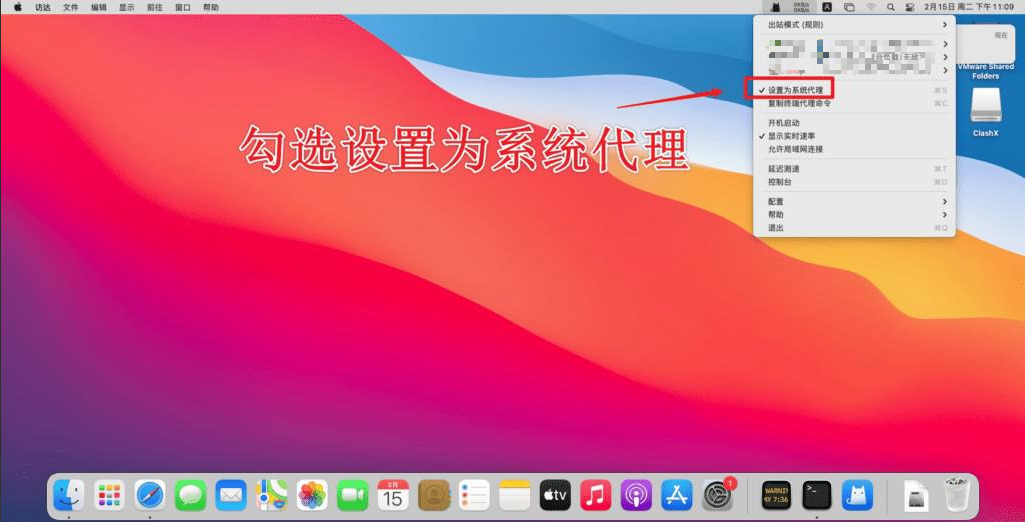
 6.设置为系统代理,完成配置
 **代理模式切换**
点击右上方系统托盘的ClashX图标,**出站模式**根据自己的需求切换
**代理模式切换**
点击右上方系统托盘的ClashX图标,**出站模式**根据自己的需求切换
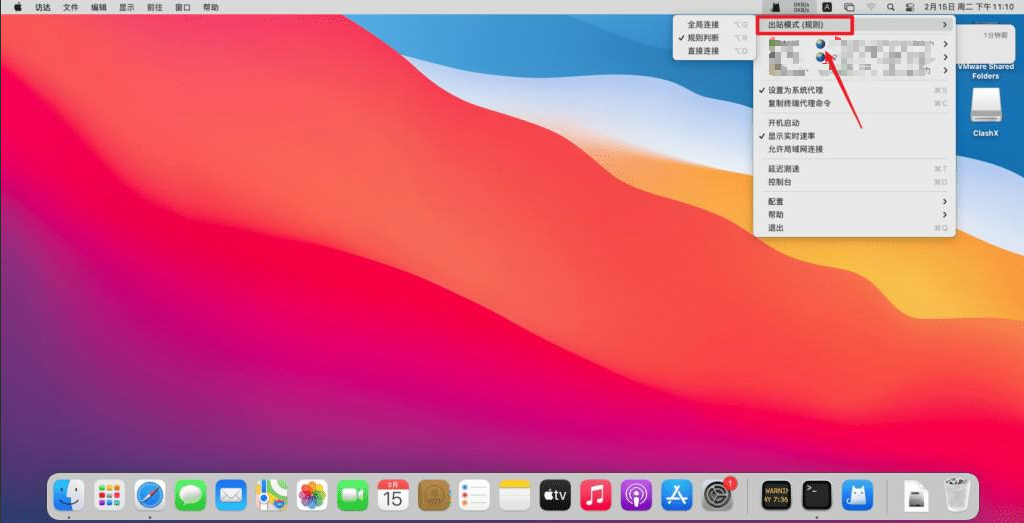 * 全局(Global):所有请求直接发往**代理服务器**
* 规则(Rule):所有请求**根据配置文件规则进行分流**
* 直连(Direct):所有请求**直接发往目的地**
* 全局(Global):所有请求直接发往**代理服务器**
* 规则(Rule):所有请求**根据配置文件规则进行分流**
* 直连(Direct):所有请求**直接发往目的地**